Saturday, July 3, 2010
New Flip Flop Designs
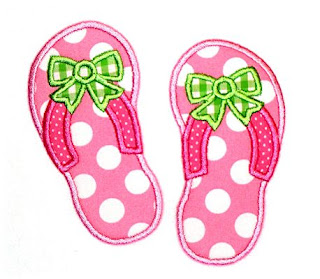
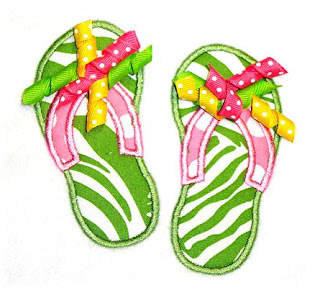
I've added two new designs this week, flip flops and flip flops with bows. These appliques are great for beach cover-ups, beach bags, towels, tshirts and more! You can also add your own ribbon bow for an adorable look! You can get these at www.appliquemarket.com and for a limited time we're having 30% off all designs!
Friday, June 18, 2010
Free Design!
Monday, June 14, 2010
Applique Tutorial
Applique only looks difficult! Follow these steps to perfection every time:
Step 2. Using sticky spray such as Sulky KK 2000, spray the wrong side of a piece of fabric that is slightly larger than the outline size. Lay the fabric on top of the outline and gently press with your hand to remove any air pockets. Start your machine again to stitch out the tack down stitch. On my designs this will be a 'double run'.
Step 3. Remove the hoop from your machine and using small curved scissors (don't even try this with regular scissors!!), cut around the shape, cutting right up against the stitching, pulling the fabric slightly where necessary to get a close cut. When you're done with this step, you should have your applique shape cut out entirely.
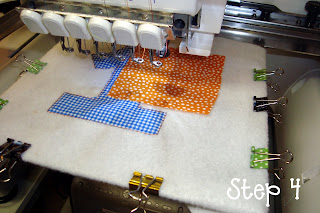
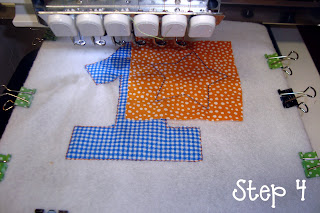
Step 4: Now put the design back in the machine and stitch out the next outline stitch for the next part of the applique. Using sticky spray such as Sulky KK 2000, spray the wrong side of a piece of fabric that is slightly larger than the outline size. Lay the fabric on top of the outline and gently press with your hand to remove any air pockets. Start your machine again to stitch out the tack down stitch. On my designs this will be a 'double run'.
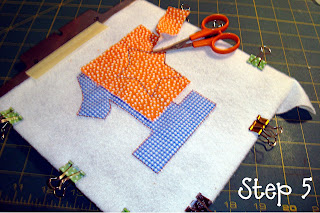
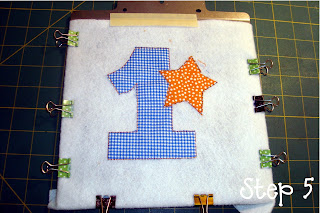
Step 5: Remove the hoop from your machine and using small curved scissors once again cut around the shape, cutting right up against the stitching, pulling the fabric slightly where necessary to get a close cut.
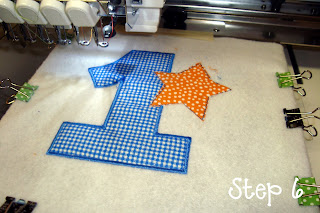
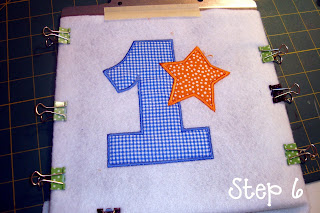
Step 6: You're almost done! Now just let the machine stitch out the finishing satin stitches to complete the design.
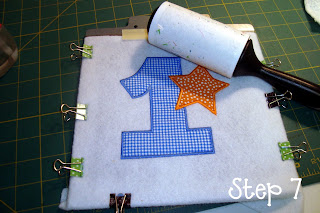
Step 7: Finally, you can use a lint roller to clean up any loose threads or fabric pieces. Now, enjoy your applique!
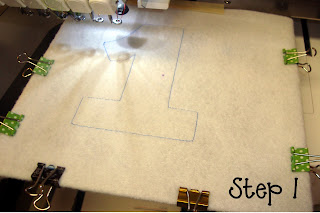
Step 1. Load your design into the machine and stitch out the first color which is the outline of the first shape.
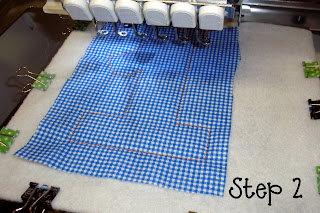
Step 2. Using sticky spray such as Sulky KK 2000, spray the wrong side of a piece of fabric that is slightly larger than the outline size. Lay the fabric on top of the outline and gently press with your hand to remove any air pockets. Start your machine again to stitch out the tack down stitch. On my designs this will be a 'double run'.
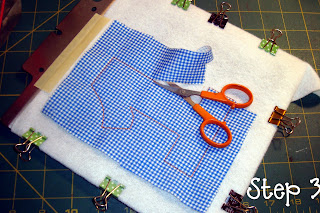
Step 3. Remove the hoop from your machine and using small curved scissors (don't even try this with regular scissors!!), cut around the shape, cutting right up against the stitching, pulling the fabric slightly where necessary to get a close cut. When you're done with this step, you should have your applique shape cut out entirely.
Step 4: Now put the design back in the machine and stitch out the next outline stitch for the next part of the applique. Using sticky spray such as Sulky KK 2000, spray the wrong side of a piece of fabric that is slightly larger than the outline size. Lay the fabric on top of the outline and gently press with your hand to remove any air pockets. Start your machine again to stitch out the tack down stitch. On my designs this will be a 'double run'.
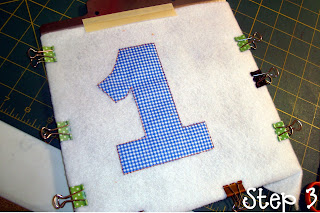
Step 5: Remove the hoop from your machine and using small curved scissors once again cut around the shape, cutting right up against the stitching, pulling the fabric slightly where necessary to get a close cut.
Step 6: You're almost done! Now just let the machine stitch out the finishing satin stitches to complete the design.
Step 7: Finally, you can use a lint roller to clean up any loose threads or fabric pieces. Now, enjoy your applique!
Firecracker Sale!
Wednesday, March 31, 2010
Appliquemarket.com is Born!
After many, many hours of putting in product, files, pictures and much testing, I have 'launched' my new website: www.appliquemarket.com
This site will offer my applique designs and all are available for Instant Download! No more waiting for those files to be emailed!
There is also a Gallery where I hope to add lots of photos of your projects using appliquemarket.com products.
Soon I will have an applique tutorial that will show the applique process, step-by-step, complete with pictures and lots of tips and tricks that I learned over the years.
I'd love to hear from you about the new site. Enjoy!
Karen
Friday, March 12, 2010
New Alphabet Finally Finished!
Tuesday, March 9, 2010
Subscribe to:
Posts (Atom)