Friday, June 18, 2010
Free Design!
Free Peace Sign applique now available at Applique Market!
Go to appliquemarket.com, click on the "Free Designs" link at the bottom of the home page, click the image to download. Check out what's new while you're there!
Monday, June 14, 2010
Applique Tutorial
Applique only looks difficult! Follow these steps to perfection every time:
Step 2. Using sticky spray such as Sulky KK 2000, spray the wrong side of a piece of fabric that is slightly larger than the outline size. Lay the fabric on top of the outline and gently press with your hand to remove any air pockets. Start your machine again to stitch out the tack down stitch. On my designs this will be a 'double run'.
Step 3. Remove the hoop from your machine and using small curved scissors (don't even try this with regular scissors!!), cut around the shape, cutting right up against the stitching, pulling the fabric slightly where necessary to get a close cut. When you're done with this step, you should have your applique shape cut out entirely.
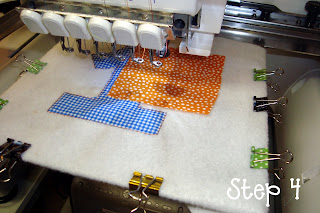
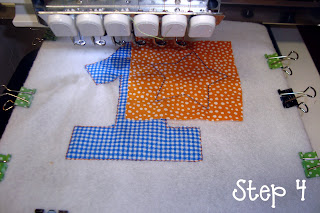
Step 4: Now put the design back in the machine and stitch out the next outline stitch for the next part of the applique. Using sticky spray such as Sulky KK 2000, spray the wrong side of a piece of fabric that is slightly larger than the outline size. Lay the fabric on top of the outline and gently press with your hand to remove any air pockets. Start your machine again to stitch out the tack down stitch. On my designs this will be a 'double run'.
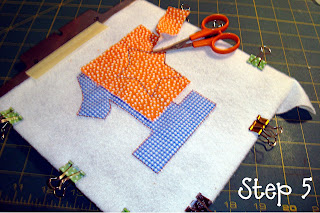
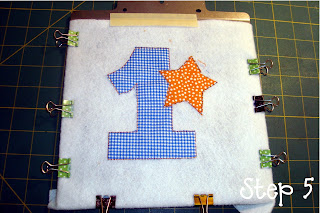
Step 5: Remove the hoop from your machine and using small curved scissors once again cut around the shape, cutting right up against the stitching, pulling the fabric slightly where necessary to get a close cut.
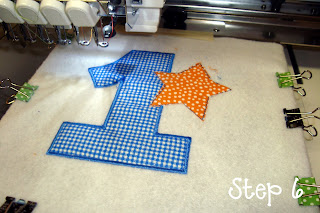
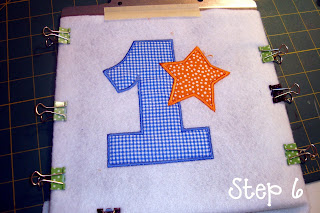
Step 6: You're almost done! Now just let the machine stitch out the finishing satin stitches to complete the design.
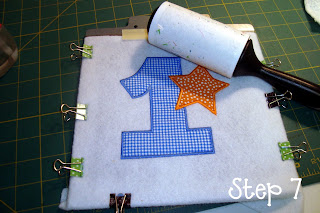
Step 7: Finally, you can use a lint roller to clean up any loose threads or fabric pieces. Now, enjoy your applique!
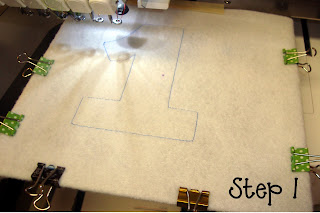
Step 1. Load your design into the machine and stitch out the first color which is the outline of the first shape.
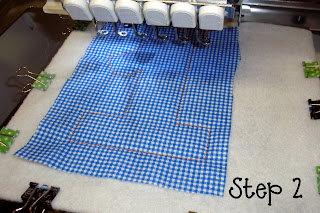
Step 2. Using sticky spray such as Sulky KK 2000, spray the wrong side of a piece of fabric that is slightly larger than the outline size. Lay the fabric on top of the outline and gently press with your hand to remove any air pockets. Start your machine again to stitch out the tack down stitch. On my designs this will be a 'double run'.
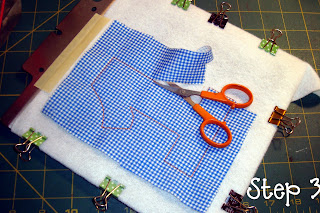
Step 3. Remove the hoop from your machine and using small curved scissors (don't even try this with regular scissors!!), cut around the shape, cutting right up against the stitching, pulling the fabric slightly where necessary to get a close cut. When you're done with this step, you should have your applique shape cut out entirely.
Step 4: Now put the design back in the machine and stitch out the next outline stitch for the next part of the applique. Using sticky spray such as Sulky KK 2000, spray the wrong side of a piece of fabric that is slightly larger than the outline size. Lay the fabric on top of the outline and gently press with your hand to remove any air pockets. Start your machine again to stitch out the tack down stitch. On my designs this will be a 'double run'.
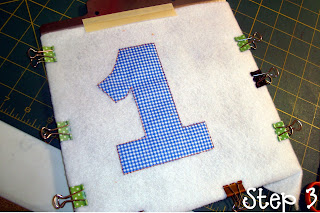
Step 5: Remove the hoop from your machine and using small curved scissors once again cut around the shape, cutting right up against the stitching, pulling the fabric slightly where necessary to get a close cut.
Step 6: You're almost done! Now just let the machine stitch out the finishing satin stitches to complete the design.
Step 7: Finally, you can use a lint roller to clean up any loose threads or fabric pieces. Now, enjoy your applique!
Firecracker Sale!
Subscribe to:
Posts (Atom)